Let me start off by saying this is a very long blog post, probably the longest I will ever create. I wanted to showcase the initial setup wizard for those of you new to setting of VMware vCloud Director. Once you have created and installed all of the Hosts, vCenter server, Database, vShield and the vCD cell you then need to setup vCD. There are several very good blog posts by other community members out there that step you through the process of setting up the base infrastructure. I will include some of the links at the end in case you need them.
I will be showing you step by step that the vCD setup wizard takes you through. This will show you how to created Virtual Datacenters, Organizations, Networks and Pools, Catalogs and Media. You will begin to get a good base understanding of how vCloud Director works. I will also point out some similarities with Lab Manger 4.0 for those of you that have used LM in the past.
Logging into vCloud Director
Before getting to this initial login screen you will need to supply a password for the admin account and enter the vCloud Serial number. You will not be able to test out vCloud Director in your lab unless you get a trial code or have an NFR license, unless you are lucky enough to have a valid license code to use.

vCloud Director first time setup Wizard
Now that you have logged in you can see below you are presented with the first screen of the vCD setup wizard. This process is broken up into 8 main parts that will step you through setting the bones of the configuration.

Read my full blog post after the jump for complete details.
Attaching a new vCenter Server to vCD
The first step is to attach to a new or existing VMware vCenter server. This is going to allow vCloud Director to gain access to VMware hosts, networks and resources pools. You will need to supply the vCenter server name or IP address along with login credentials.

The next step is going to ask for details about connecting to the vShield Manager virtual machine that you imported. This is going to handle all of the firewall and security features in vCloud Director.

The last screen in this stage is displaying the information that you entered before committing it. Make sure to double check since it will be easier to change now than having to go back and change later.

Create Provider vDC
You have now moved to stage 2 of the initial setup wizard for vCD. In this stage you will create your first Provider vDC (Virtual Data Center). You can use vDC’s to divide up your compute power for locations, SLA’s or any other physical or logical reason that you may have.

You will now select a vCenter server to connect to from the first column. This will then populate a list of resources pools, these pools with show any that exist currently on your VC server. This includes the root pools for the VMware hosts.

Next you will select the datastore(s) that you wish to grant access to on this Virtual Datacenter. The list is populated based on the vCenter server that you selected in earlier step.

In this step you need to provide credentials so that vCD can install the vCloud Director agent onto each host to allow it access to the resource pools that you selected earlier. You can use a global set of credentials or an ID specific to a certain host depending on your setup.

The last page is a summary of your selections for this stage.

Create External network in vCD
So starts the next stage of the vCD setup wizard which covers the External network setup. This screen is going to pull networks/port groups from the vCenter server that you are connected to. These networks will allow you connection out to the internet or your production network for example. In my sample Lab used for this write up I create a couple of empty port groups.

This step is now gathering network related details and asking you to assign a Static IP pool for use on this network. This reminds me very much of Lab Manager 4 in setting up network within that product.

This step is just asking you to provide a meaningful name and description to the External Network so that it will make sense to people when looking at it later.

Final screen is again a confirmation screen showing your selections before committing them.

a
Create Network Pool in vCD
So in this stage you are going to setup a Network Pool in vCloud Director. You can see from the image below that there could be 3 options based upon how you have setup your infrastructure. Since my lab is a simple setup for now I’m not using VLAN tagging or a vNetwork Distributed Switch. So my only option was to use vSphere port group based network pools.

This step is asking you to select the vCenter server that you will be using to setup this stage, in case you have more than one.

I am now able to select a port group from the list below. The only thing to note here was that it states that it must be an unused port group. So make sure that it is empty.

Again you are just providing a name and description that will make sense later. You could name these based on location, customer, business division or any other logical reason for your install.

Create New Organization in vCD
Now we move onto the next stage of vCD setup wizard. In this part we will be creating an Organization that will consume resources. This Organization is very similar to what an Organization was in VMware Lab Manager. You can use them to setup a Company, Customer or Business unit. Its up to you and your business need as to how you will divide things up.

For each Organization you will have different options on how you will setup LDAP for authentication. This is where vCD separates its self from Lab Manager. Since LM was geared towards working with only one LDAP. With vCD you can work with different LDAP sources for each Organization.

For simplistic reasons I choose not to use LDAP for my lab. So below I am creating a user manually for the sake of this lab. You can see that a role is assigned along with generic user information.

For the remainder of the user setup window you can see that for each user you have additional options that can be set. Your allowed to setup the number of Virtual Machines that can be stored or Running for the user.

This screen is showing the user that I created and allows me to create additional ID’s if needed.

This step allows you to choose whether the Organization that you are creating will be able to publish / share its Catalog with other Organizations within vCloud Director. There could be several reasons that come to mind that you might want to do this. Again you need to give this thought to see how it fits into your overall plan. You can always change this by editing the Org later on.

This step allows you to setup the Email preferences to allow VMware vCD to send email alerts.

This step is setting up the retention policies on Virtual Machines that will live within this Organization. On this screen you can set policies that control the Maximum runtime leases within VMware vCloud Director along with Storage Leases. There are also options to control the leases for vApp templates.

This screen is a continuation of the policies screen from above. Is this lower portion of the policies section you can set Quotas on the number of Running Virtual Machines and Stored VM’s. There are also some additional limits at the bottom that can be applied for connections and resource intensive operations.

This last screen is the settings confirmation screen.

Allocate resources to an Organization
So onto the next stage of the setup and we are now Allocating resources to our Organization that we created earlier. You can see below the Provider DC that we created is listed and its showing us the percentage of Processor, Memory and Storage used.

On this step we are presented with 3 different Resource Allocation Models that we can use. The choices are Allocation Pool, Pay as you go and Reservation Pools within VMware vCloud Director.

In this screen I select the Resource Allocation Method so that you can see how resources are controlled. This Resource Model lets you control the amount of CPU GHz at a percent guarantee. You also have the same approach for Memory allocation. There is a setting more max number of VM’s that can be created also. In the lower portion vCloud Director is giving you an estimate based upon the settings you have chosen and the available resources of the Organization that you have setup.

I backed up a step and choose the Pay as you Go Model in vCD to let you see the options available with this method. This method is only commiting resources when the vApps are running in the Organization VDC.

And lastly the third model is the Reservation Pool Model that is being shown below. This method offers guaranteed resources to the Organization vDC and lets users control and commit on a per VM basis.

Next it’s asking we to allocate storage to this Organization. It is showing me the amount of space available in the Datastore that was assigned to the Org when we set that up earlier. You can then commit the amount that you want and decide if you want it to be Thin provisioned.

Now we need to select a Network Pool.

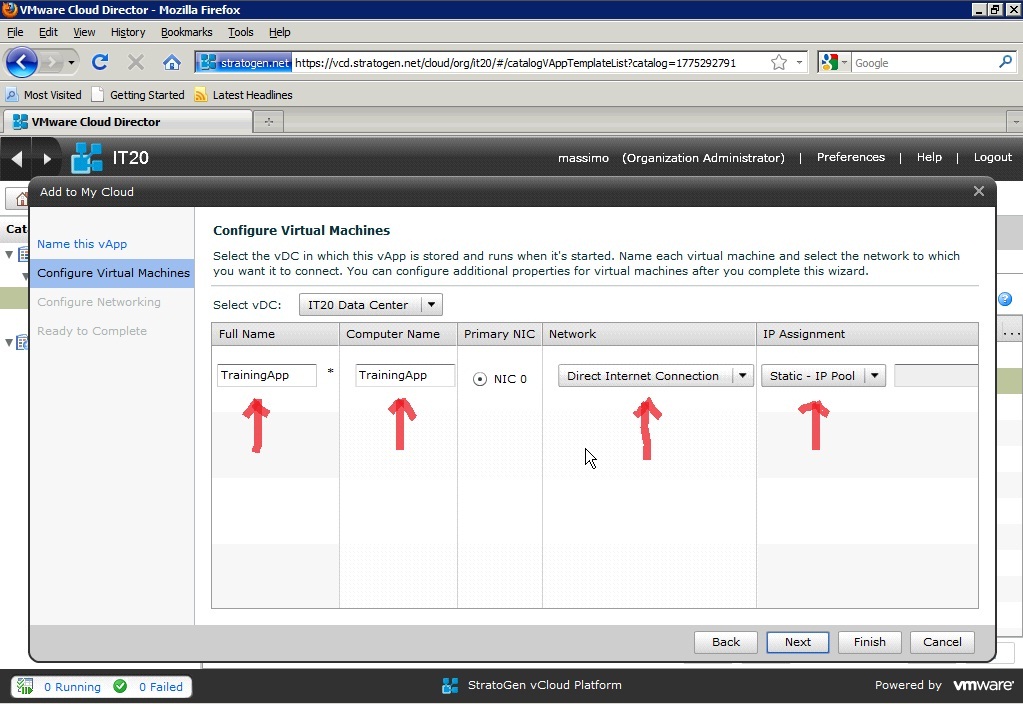
Next you need to name your Organization vDC just as we did in other steps. You also can choose to Enable the vDC now or leave it inactive for now.

The final screen is confirming your selections.

Add Network to an Organization
Ok it’s network time in the setup wizard. As you can see from the image below its allowing you to create Internal and External networks in your Org. This also reminds me a log of Lab Manager with it’s Virtual Networks. You can see from the option below that its using a NAT’d setup and routing the external traffic into our Org. There is also and Advanced setup option which is shown in the next image.

In this image I selected the Advanced option to setup the network settings.

This is the option that I ended up selecting for it’s simple setup. It will have a internal and external connection but the external will have a direct connection. So it won’t be fenced or fire walled off and need traffic routed to it.

In this step you are setting up the Internal Org Network for vCD. You can see the available port groups that are setup on your vCenter server. It allows you to see only networks that this Org has permissions to use or see all available networks.

You are now setting up IP information for your Internal Network.

Now you must name the Internal vCD Organization Network.

This step you are setting up the External Organization network and selecting from available networks that were setup earlier for external use.

Here is just the confirmation screen.

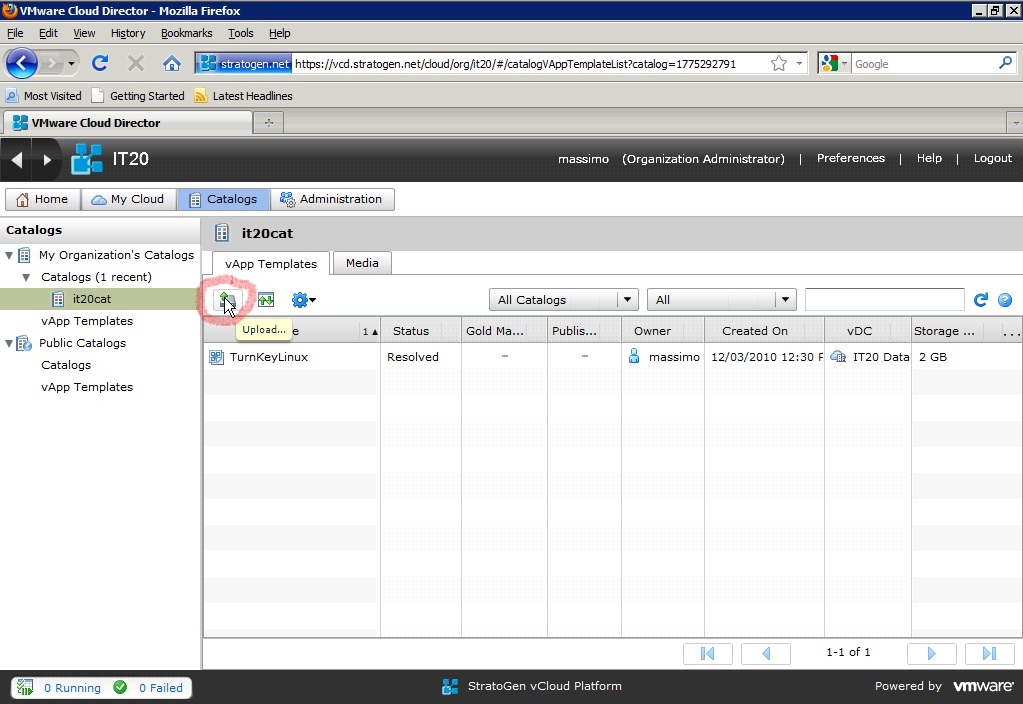
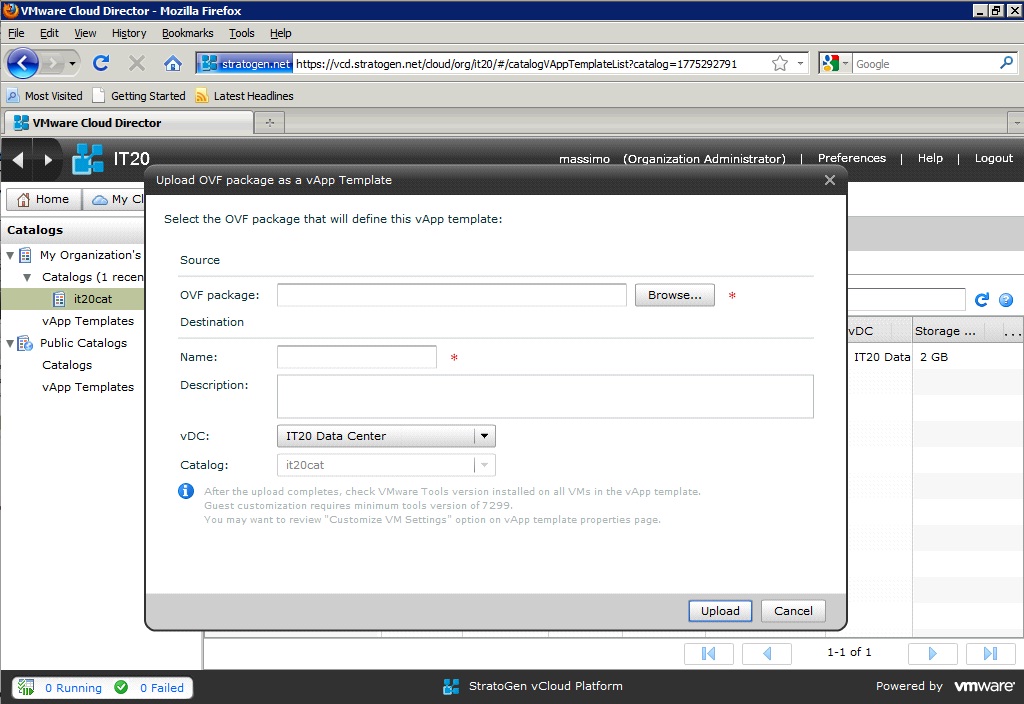
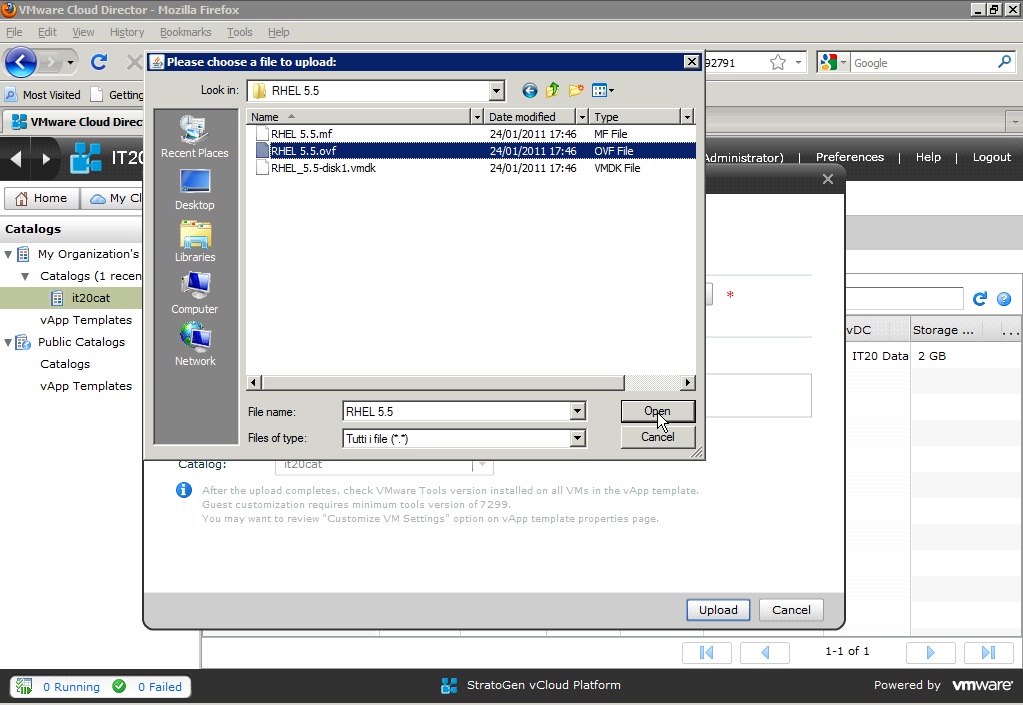
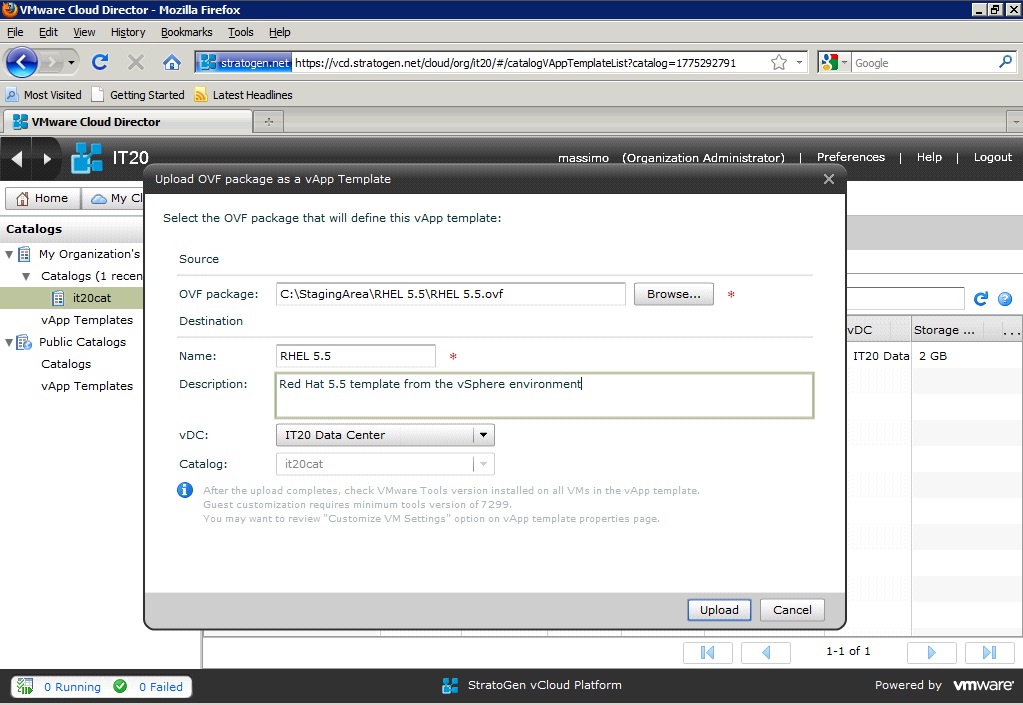
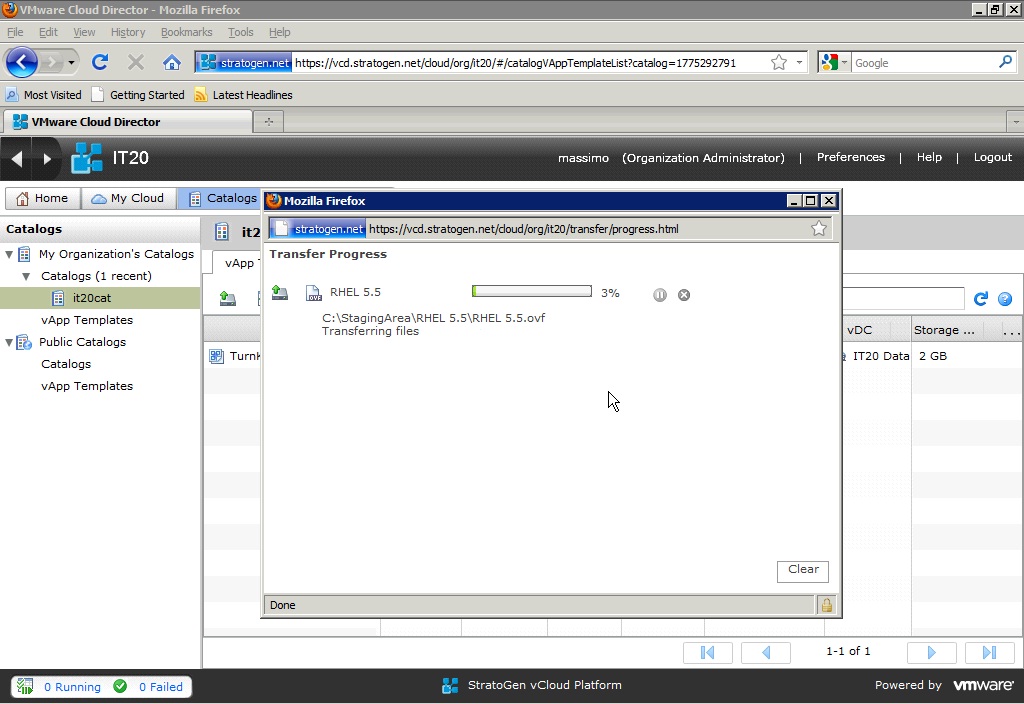
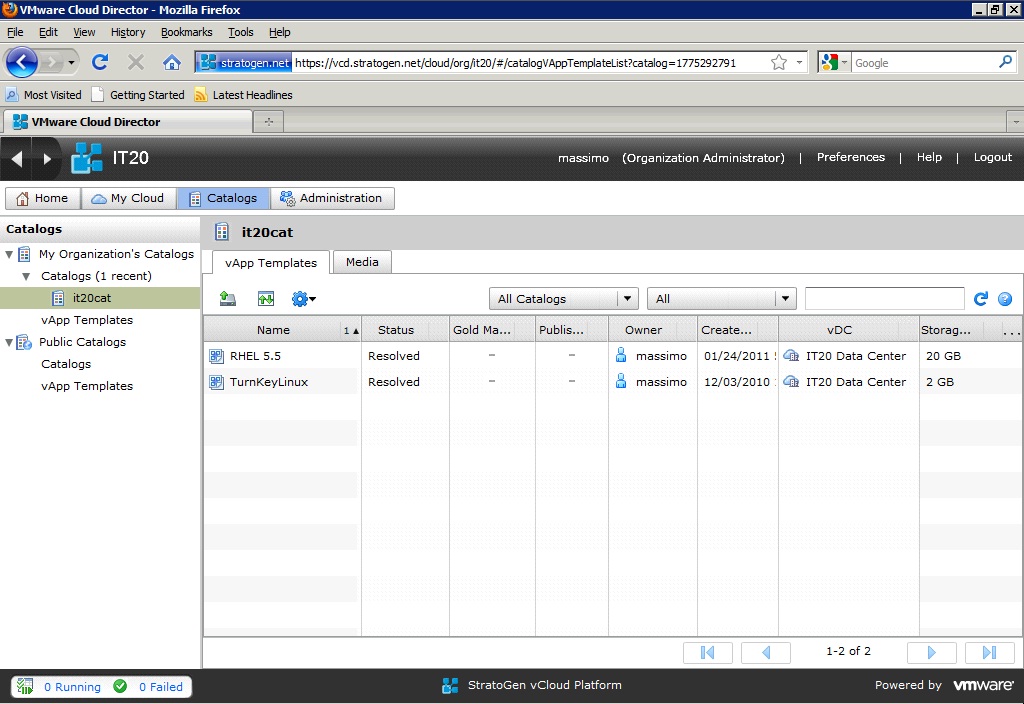
Create a vCD Catalog
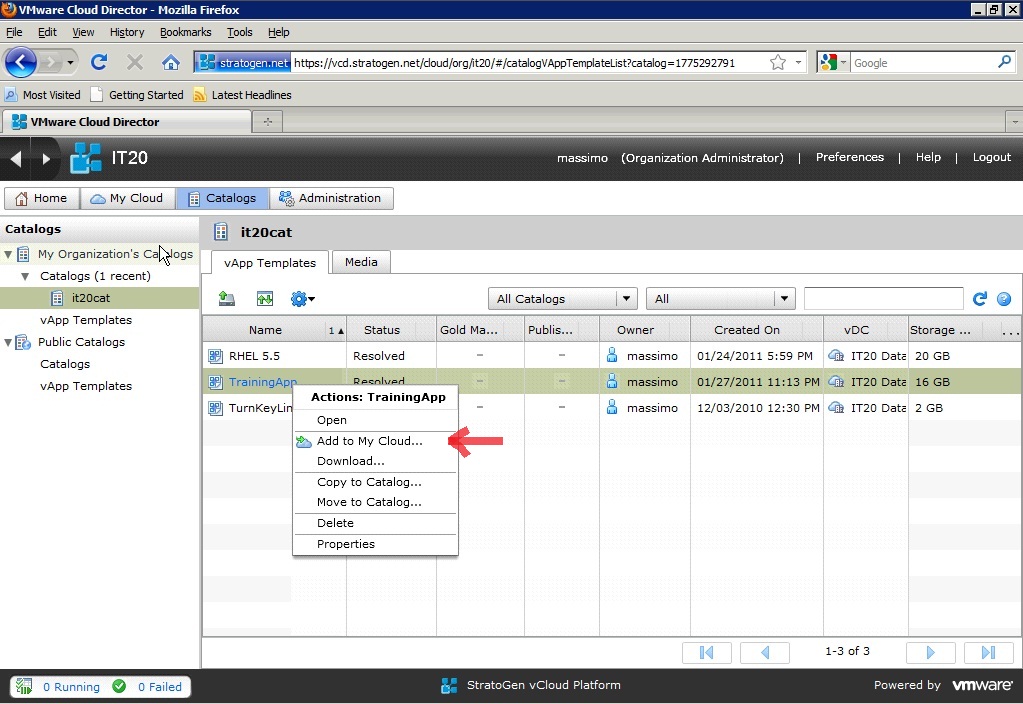
Now onto the final step of the setup wizard. You are now going to create a Catalog for your customer. You are presented with a list of customers that are setup, select the right one and proceed. This is another step again that reminds me a lot of how Lab Manager worked. The vCD Catalog feature is kind like what the Library feature in Lab Manager strives to be. Within a Catalog you will be able to publish Templates, vApps and Media for people to consume.

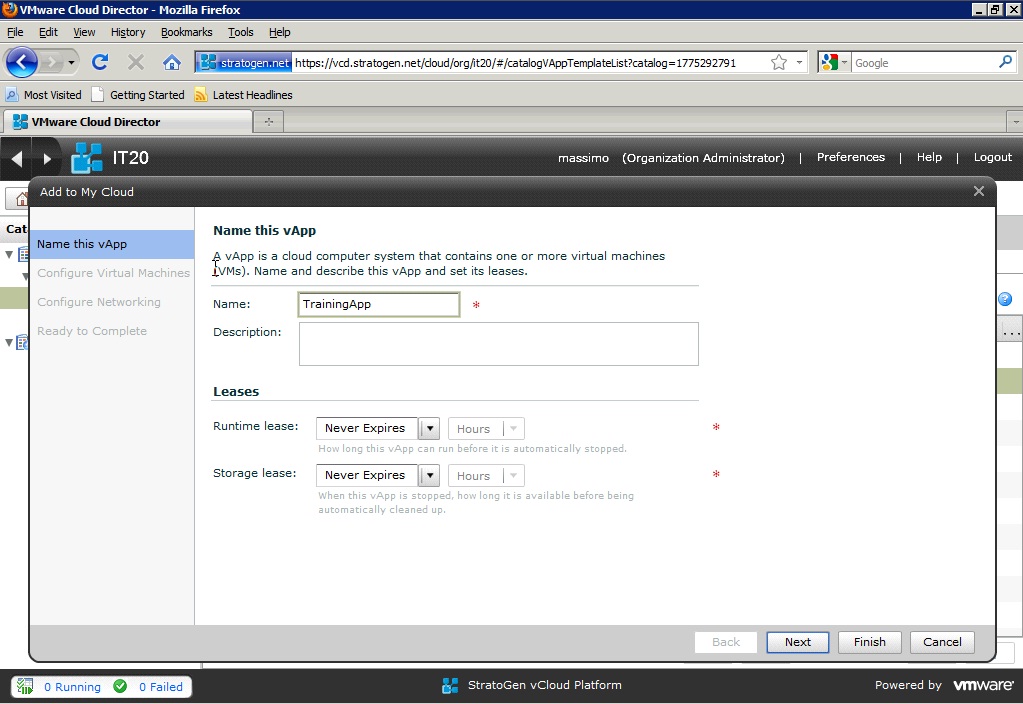
Your just naming your Catalog in the vCD step.

This screen is asking if you want to have the vCD Catalog remain private to this Organization or allow if to be published for other Organizations to use.

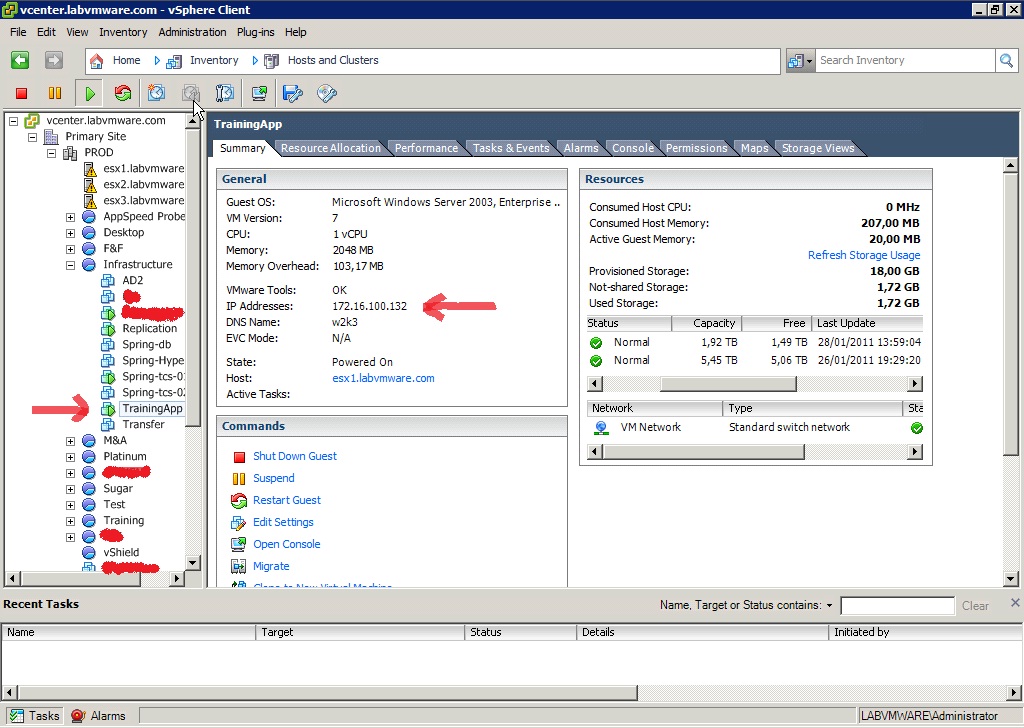
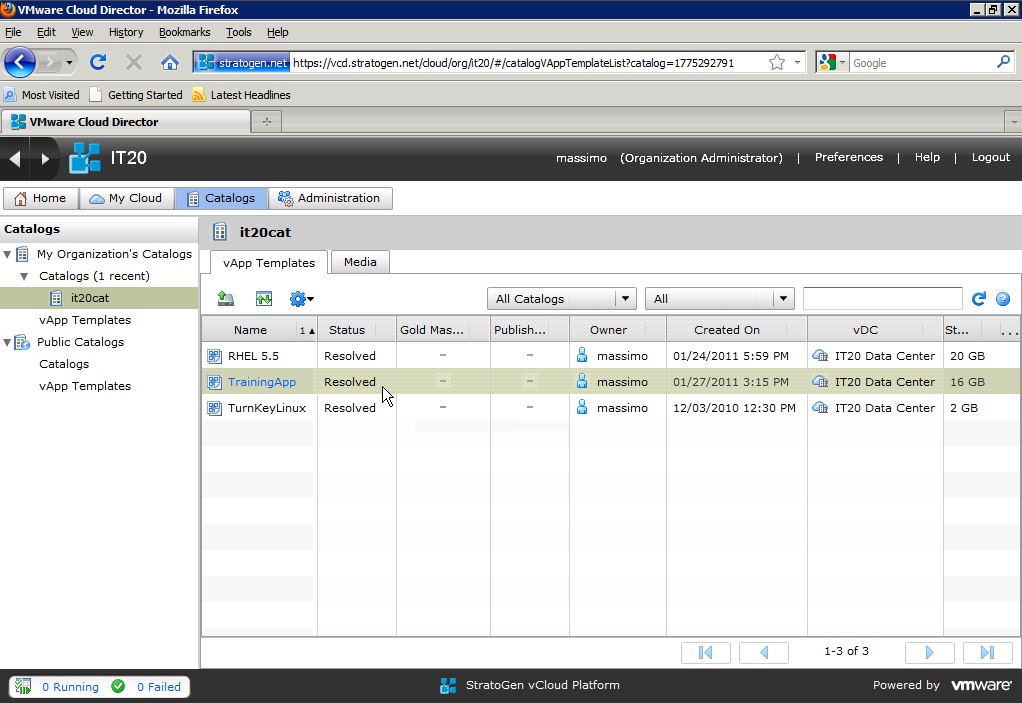
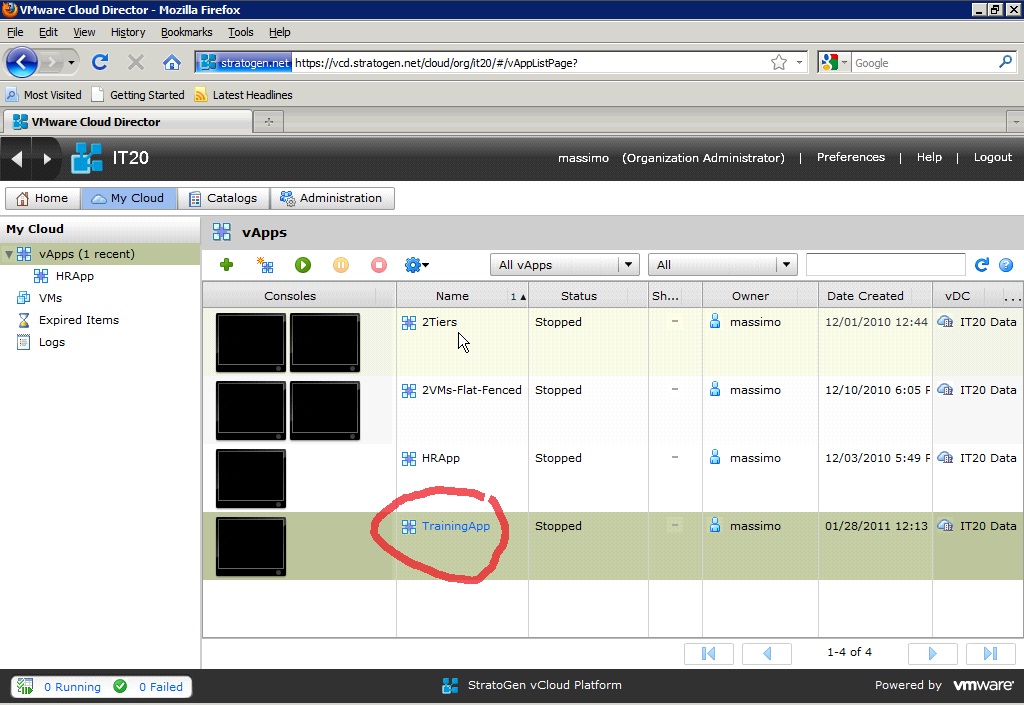
You have now finished the basic setup of VMware vCloud Director. From this point you can create Virtual Machines, vApps and attach media to the Catalog and allow them to be used. All of these steps from the wizard are the same methods that you will use later on to add additional resources from within the vCD admin panel. So these screens will become very familiar as you use the product more.
OK as promised here is a list of good blog articles from other community members that have documented the setting up of the underlying infrastructure required to run VMware vCloud Director. These guys have created great step by step guides some including videos to show you how to create and install the virtual machines necessary before you can get to this stage.
Hany from Hypervisor – vCloud install
Duncan from Yellow Bricks – vCloud install
Source - http://www.virtualizetips.com/2010/10/initial-setup-for-vmware-vcloud-director-and-setting-up-provider-vdc/
